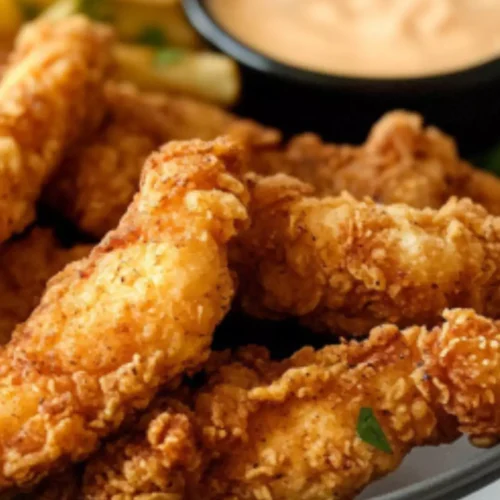
Before diving into the homemade version of Raising Cane’s chicken tenders, let’s explore what you can serve with them. Trust me; these tenders are a hit on their own, but pairing them with complementary sides can elevate your meal to the next level. You might consider a bed of crisp coleslaw for a crunchy texture. Maybe some fluffy biscuits or even French fries to capture that iconic fast-food experience.
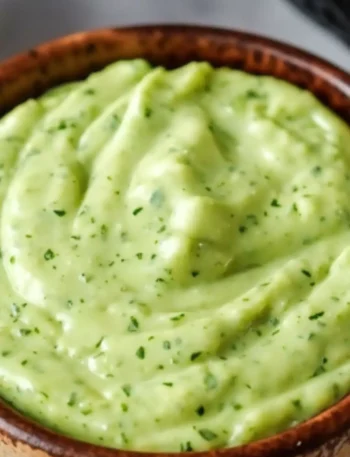
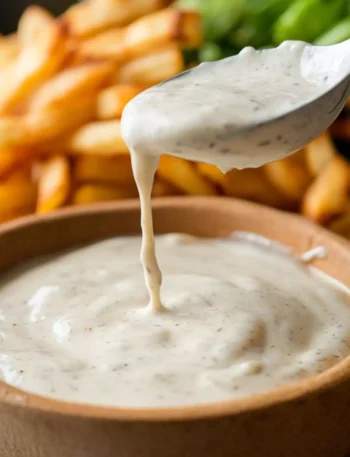
How about some zesty dipping sauces? Honey mustard or barbecue sauce can make perfect companions. And let’s not forget a nice refreshing salad on the side to balance everything out. Think about those vibrant ingredients—tomatoes, cucumbers, and a tangy dressing; they light up the plate!

Now, let me tell you why crafting this chicken tender recipe is a fantastic choice. I’m a registered dietitian and a food enthusiast with a passion for making recipes that don’t just taste great but also fit a healthy lifestyle. When I first attempted these chicken tenders, I was astonished at how easy it was to create something so delicious right in my kitchen. With a blend of seasonings, fresh ingredients, and a few simple steps, you can replicate that popular flavor and crispy texture at home.
This recipe stands out because it allows you to control what goes into your food. No sneaky preservatives or mystery ingredients here! And let’s face it—the satisfaction of biting into a homemade chicken tender, gone crispy and golden, is far superior to anything you’ll find in a drive-thru. Plus, it’s a fun project, especially if you have kids at home who want to lend a hand. Believe me, sharing this experience together is a great way to bond.
You will also like the following Appetizer recipes!
- Best Mexican Rice With Black Beans And Corn
- How to make Mongolian Ground Beef Noodles
- Copycat Pickled Jalapenos In Chili
How I Have Used the Ingredients in This Recipe
The magic of this dish lies in its ingredients. For starters, I love experimenting with fresh chicken breasts. They are lean and packed with protein. When sliced into strips, they make the perfect canvas for flavor. The cultured buttermilk serves as a fantastic marinade; it not only tenderizes the chicken but also infuses it with a subtle tang. Believe me, the first time I marinated chicken, I was amazed at how juicy and tender it became.
Next, the seasoning mix is something I take pride in—I don’t skimp on flavor here. A little smoked paprika gives that beloved hint of smokiness, while garlic powder and onion powder bring depth. Oh, and the cayenne pepper offers a delightful kick that many people overlook. And when it comes to breading, you can’t beat that satisfying crunch that comes from Italian-style breadcrumbs mixed with flour.
So let’s dig into the details.
Ingredients List
- 3 chicken breasts, sliced into strips
- 4-5 cups canola oil (for frying)
Marinade:
- 1 cup cultured buttermilk
- 1 large egg
- 1 tbsp garlic powder
Dredging:
- 3/4 cup cultured buttermilk
- 1 tbsp seasoning mix
Flour Coating:
- 1 ½ cups all-purpose flour
- 1 tbsp cornstarch
- 1 tsp baking soda
- 1 cup Italian-style bread crumbs
- Remaining seasoning blend (reserve 1 tbsp for dredging)
Seasoning Mix:
- 1 tbsp freshly cracked black pepper
- 1 tbsp kosher salt
- 1 tbsp smoked paprika
- 1 tbsp garlic powder
- 1 tbsp onion powder
- 1 tsp cayenne pepper (for a little heat)
Dipping Sauce:
- ½ cup mayonnaise
- ¼ cup ketchup
- 1 tsp Worcestershire sauce
- ½ tsp garlic powder
- ½ tsp freshly cracked black pepper
- 1 tbsp white vinegar
- 1 tsp hot sauce (for an extra zing)

How to Make Raising Cane’s Chicken Tender
Step 1: Preparing the Marinade
In a large mixing bowl, combine the cultured buttermilk, egg, and garlic powder. Whisk them together until fully mixed. Your chicken will benefit immensely from this marinade, becoming flavorful and exceptionally tender.
Step 2: Marinating the Chicken
Take your chicken strips and immerse them in the marinade. Ensure every piece is covered. Cover the bowl and let it sit in the fridge for at least 1 hour. If you have the time, extending the marination overnight will take the flavor up a notch!
Step 3: Making the Dredging Mix
In another bowl, place the 3/4 cup of cultured buttermilk alongside your reserved seasoning mix. This step is crucial as it adds another layer of taste to the chicken.
Step 4: Bread and Prepare for Frying
In a third bowl, mix the flour, cornstarch, baking soda, and the Italian breadcrumbs. You want to blend them thoroughly to ensure the coating will be consistent.
Step 5: Coating the Chicken
- Remove the marinated chicken from the fridge.
- Dip each piece in the buttermilk dredging mixture, allowing the excess to drip off.
- Next, roll the chicken strips in your flour and breadcrumb mixture until fully coated. Repeat until all pieces are breaded.
Step 6: Prepping the Oil
In a large pot or deep fryer, heat the canola oil over medium-high heat. Use a thermometer if you have one; the oil should reach about 350°F (175°C). This is key to achieving that golden, crispy texture.
Step 7: Frying the Chicken
Carefully place only a few chicken strips in the hot oil, leaving enough room for the oil to bubble. Fry them in batches for about 4-6 minutes, turning once, until they reach a beautiful golden color. Always check to ensure they are cooked through! Use a meat thermometer to check—they should reach 165°F (74°C).
Step 8: Draining and Serving
Once done, let the chicken tenders drain on a paper towel-lined plate to soak up excess oil.
Recipe Notes
- Chicken Breasts: Opt for fresh, high-quality chicken breasts for the best results. Frozen varieties can work, but you will need to thaw them completely.
- Buttermilk: This ingredient not only enhances tenderness but also adds flavor. If you don’t have buttermilk, you can create a substitute by mixing milk with a tablespoon of vinegar or lemon juice.
- Flour Mixture: The blend of cornstarch and baking soda helps to achieve that ideal crunch. Don’t skip this step.
- Oil Temperature: Maintaining a consistent frying temperature is crucial for achieving that crispy exterior. Too cool, and the chicken becomes soggy; too hot, and it burns.
- Storing Leftovers: If you happen to have any leftovers, store them in an airtight container in the fridge for up to 3 days. Reheat them in an oven to retain their crispiness.

Recipe Variations
While this recipe is fantastic as is, feel free to get creative. You can experiment with different seasonings in the breading, like cayenne for extra heat or Italian herbs for a Mediterranean twist. Want a healthier version? Try air-frying the chicken strips instead of deep-frying for less oil while maintaining that crispy allure.

Raising Cane’s Chicken Tender Recipe
Equipment
- Whisk
- deep fryer
Ingredients
- 3 chicken breasts sliced into strips
- 4-5 cups canola oil
Marinade
- 1 cup cultured buttermilk
- 1 large egg
- 1 tbsp garlic powder
Dredging
- 3/4 cup cultured buttermilk
- 1 tbsp seasoning mix
Flour Coating
- 1 ½ cups all-purpose flour
- 1 tbsp cornstarch
- 1 tsp baking soda
- 1 cup Italian-style bread crumbs
- All of the seasoning blend reserve 1 tbsp for dredging
Seasoning Mix
- 1 tbsp freshly cracked black pepper
- 1 tbsp kosher salt
- 1 tbsp smoked paprika
- 1 tbsp garlic powder
- 1 tbsp onion powder
- 1 tsp cayenne pepper for a bit of heat
Dipping Sauce
- ½ cup mayonnaise
- ¼ cup ketchup
- 1 tsp Worcestershire sauce
- ½ tsp garlic powder
- ½ tsp freshly cracked black pepper
- 1 tbsp white vinegar
- 1 tsp hot sauce for extra zing
Instructions
Step 1: Preparing the Marinade
- In a large mixing bowl, combine the cultured buttermilk, egg, and garlic powder. Whisk them together until fully mixed. Your chicken will benefit immensely from this marinade, becoming flavorful and exceptionally tender.
Step 2: Marinating the Chicken
- Take your chicken strips and immerse them in the marinade. Ensure every piece is covered. Cover the bowl and let it sit in the fridge for at least 1 hour. If you have the time, extending the marination overnight will take the flavor up a notch!
Step 3: Making the Dredging Mix
- In another bowl, place the 3/4 cup of cultured buttermilk alongside your reserved seasoning mix. This step is crucial as it adds another layer of taste to the chicken.
Step 4: Bread and Prepare for Frying
- In a third bowl, mix the flour, cornstarch, baking soda, and the Italian breadcrumbs. You want to blend them thoroughly to ensure the coating will be consistent.
Step 5: Coating the Chicken
- Remove the marinated chicken from the fridge.
- Dip each piece in the buttermilk dredging mixture, allowing the excess to drip off.
- Next, roll the chicken strips in your flour and breadcrumb mixture until fully coated. Repeat until all pieces are breaded.
Step 6: Prepping the Oil
- In a large pot or deep fryer, heat the canola oil over medium-high heat. Use a thermometer if you have one; the oil should reach about 350°F (175°C). This is key to achieving that golden, crispy texture.
Step 7: Frying the Chicken
- Carefully place only a few chicken strips in the hot oil, leaving enough room for the oil to bubble. Fry them in batches for about 4-6 minutes, turning once, until they reach a beautiful golden color. Always check to ensure they are cooked through! Use a meat thermometer to check—they should reach 165°F (74°C).
Step 8: Draining and Serving
- Once done, let the chicken tenders drain on a paper towel-lined plate to soak up excess oil.
Notes
- Chicken Breasts: Opt for fresh, high-quality chicken breasts for the best results. Frozen varieties can work, but you will need to thaw them completely.
- Buttermilk: This ingredient not only enhances tenderness but also adds flavor. If you don’t have buttermilk, you can create a substitute by mixing milk with a tablespoon of vinegar or lemon juice.
- Flour Mixture: The blend of cornstarch and baking soda helps to achieve that ideal crunch. Don’t skip this step.
- Oil Temperature: Maintaining a consistent frying temperature is crucial for achieving that crispy exterior. Too cool, and the chicken becomes soggy; too hot, and it burns.
- Storing Leftovers: If you happen to have any leftovers, store them in an airtight container in the fridge for up to 3 days. Reheat them in an oven to retain their crispiness.
Nutrition
Frequently Asked Questions
1. Can I use frozen chicken for this recipe?
Yes, you can use frozen chicken, but ensure it is fully thawed and patted dry before marinating. This helps in even cooking and better flavor absorption.
2. Can I bake these chicken tenders instead?
Absolutely! If you prefer baking, preheat your oven to 425°F (220°C), place the breaded chicken on a lined baking sheet, and bake for about 20-25 minutes, flipping halfway through.
3. How can I make this recipe gluten-free?
To make gluten-free chicken tenders, substitute the all-purpose flour with a gluten-free flour blend and use gluten-free breadcrumbs.
4. Can I prepare the tenders in advance?
Yes! You can marinate the chicken a day ahead and even bread them. Keep them in the fridge until you’re ready to fry.
5. What if I don’t like spicy food?
If you’re not a fan of heat, simply leave out the cayenne pepper from the seasoning mix. The tenders will still be incredibly flavorful.
6. Can I use another type of oil for frying?
Certainly! While canola oil is great, you can also opt for peanut oil or vegetable oil, both of which have high smoke points and are perfect for frying.
Conclusion
Creating a homemade version of Raising Cane’s chicken tenders brings joy, taste, and healthy eating right into your kitchen. With a handful of simple ingredients and a clear plan, you’ll have crispy, delectable tenders in no time. The satisfaction of serving a dish made with your own hands, along with the stories you can share about making it, is unmatched.
So roll up your sleeves, channel your inner chef, and enjoy every bite of this flavorful journey. It’s not just about the meal; it’s about the experience, the laughter, and the memories you create along the way. Happy cooking!


