Sarah Brown
When it comes to celebrations that call for a show-stopping cake, nothing quite matches the charm of a layered chocolate treat celebrating a special occasion—like Hagrid’s birthday! This delightful cake not only tastes divine, but it also has a whimsical flair that appeals to both kids and adults alike. Imagine gathering friends and family around a table, laughter mingling with the promise of cake. Pair this cake with a cup of hot cocoa or a chilled glass of milk, and you’ll feel just like you’re at Hogwarts, toasting to friendship and magical adventures.

Hagrid’s birthday cake could easily become your go-to recipe for any festive gathering. Inspired by the enchanting world of Harry Potter, this cake features layers of moist chocolate goodness topped with a fluffy buttercream frosting. Whether you’re planning a birthday bash or simply want to indulge your sweet tooth, this cake ticks all the boxes for deliciousness and presentation. Trust me, after you serve this up, your guests will be raving about it long after the last bite!
You Might Like These Recipes!
What is Hagrid’s Birthday Cake?
Hagrid’s birthday cake is a whimsical, decadent chocolate layer cake famous in the Harry Potter series. It’s a cake big enough to impress, with hints of lore that make it feel special. Picture a rich chocolate flavor paired with fluffy frosting that’s hard to resist. This cake is usually adorned with a playful, yet heartfelt, inscription like “Happee Birthdae,” capturing Hagrid’s love for all things big and magical.
What Makes This Recipe Different From Other Hagrid’s Birthday Cake?
My rendition of Hagrid’s cake incorporates a few twists that elevate both the taste and the texture. Instead of relying solely on basic ingredients, I’ve added a subtle hint of espresso powder to deepen the cake’s chocolate flavor. This recipe focuses on balancing the richness with lighter, more delicate buttercream frosting, ensuring that each bite is deliciously satisfying without being overwhelmingly sweet.
How Does It Taste Like?
Expect a burst of flavors in every slice. The chocolate cake is rich and moist, with a hint of espresso that enhances its depth. The buttercream is silky smooth and not overly sweet, allowing the chocolate to truly shine. Together, they create an inviting treat that’s perfect for celebrations. Each bite feels like a little piece of magic!
Ingredients You’ll Need To Make This Dish
To craft this delightful creation, gather the following ingredients:
Cake:
– 1¾ cups all-purpose flour
– 3/4 cup cocoa powder
– 2 teaspoons baking soda
– 3/4 teaspoon baking powder
– 1 teaspoon salt
– Scant 2 cups granulated sugar
– 3 large eggs
– 1 cup buttermilk
– 1/2 cup vegetable oil
– 1 teaspoon pure vanilla extract
– 1 cup warm coffee
– Optional: 1 tablespoon espresso powder for an enhanced chocolate flavor
Frosting:
– 2 cups softened butter
– 6 cups powdered sugar
– 6 tablespoons heavy cream
– 2 teaspoons pure vanilla extract
– Optional: A pinch of sea salt for contrast in flavor
Feel free to switch things up based on what you have at home or what’s in season!
Ingredients From : onesweetappetite.com
How to Make Hagrid’s Birthday Cake?
Making Hagrid’s birthday cake is quite simple, and even better, it’s fun! Follow the steps below for a cake that’ll wow your guests and have them wanting seconds.
Step-by-step Directions
Step 1: Prepare your pans

Start by preheating your oven to 350°F (175°C). Grease three 8-inch round cake pans thoroughly, then dust with flour or line them with parchment paper. This ensures your cakes lift out seamlessly, ready for frosting!
Step 2: Mix the dry ingredients

In a medium bowl, sieve together the flour, cocoa powder, baking soda, baking powder, espresso powder (if using), and a pinch of salt. This step avoids any lumps and combines everything nicely. Set it aside while you tackle the wet ingredients.
Step 3: Whip up the batter

In a large mixing bowl, beat together the sugar and eggs on medium speed. Do this for about 2-3 minutes until the mixture becomes light and fluffy—it’s like whipping up clouds! Once fluffy, add in the buttermilk, vegetable oil, and vanilla extract. Mix until everything is fully blended.
Step 4: Combine wet and dry ingredients

Now pour the dry ingredients into the wet mixture. Alternate adding in the warm coffee to the batter. Stir gently until combined, but don’t overdo it! Just enough to meld all the ingredients, then scrape down the sides of the bowl and mix again for another minute to ensure a uniform batter.
Step 5: Divide the batter

First, weigh your mixture if you have a scale to divide evenly, but if not, eyeballing is fine! Pour approximately 16 ounces of batter into each cake pan.
Step 6: Bake those beauties

Slide your pans into the preheated oven and bake for 18–20 minutes. Keep an eye on them! A toothpick inserted in the center should come out clean when they’re done. Let them cool in the pans for about 20 minutes; this will make them easier to remove.
Step 7: Cool on a rack

Carefully turn out the cakes onto a wire rack to cool completely. Cooling is crucial; you want your layers to be cool enough to frost without melting the buttercream.
Step 8: Make the frosting

Using a stand mixer fitted with a paddle attachment, beat the softened butter for about 2-3 minutes until it’s creamy and smooth. Gradually add in the powdered sugar one cup at a time, mixing on low until it’s all combined. Next, stir in the heavy cream, and vanilla extract, then scrape the sides of the bowl. Beat on medium speed for approximately 5 minutes until the frosting is fluffy and light—a treat for your taste buds!
Step 9: Color your frosting

Scoop out 1/2 cup of frosting into a small bowl and tint this green (using food coloring), while the rest of it remains the classic pink. This combination adds a whimsical touch to your cake.
Step 10: Assemble the cake

To bring it all together, place one layer of the cooled cake on a serving plate. Spread around 1 cup of the frosting on top. Place the second layer of cake on top, and you can either stop there or add the third layer for that going-the-extra-mile vibe! Frost the entire outside with the pink frosting, smoothing it out but leave it somewhat rugged for that signature Hagrid look.
To top it all off, pipe your “Happee Birthdae” message across the top with the green frosting—a perfect capstone for your magical cake!
Tips & Tricks On Making Hagrid’s Birthday Cake:
– Ingredient Temperature: Make sure your eggs and buttermilk are at room temperature for an evenly mixed batter.
– Tap it Out: After filling your pans, skip the oven floor shake. Instead, tap the pans gently on the counter to release any air bubbles.
– Cooling Time: Don’t rush the cooling process. Let the cakes cool completely to prevent the frosting from sliding off.
– Frosting Technique: To achieve a rustic finish, use a spatula to create swirls and texture on the frosting.
– Make Ahead: You can bake the cakes ahead of time and freeze them. Just thaw before frosting for a stress-free assembly.
How Do I Store This Dish?
To store Hagrid’s birthday cake, place it in an airtight container at room temperature if you are serving it within a couple of days. If you’re storing it for longer, wrap each cake layer or the whole assembled cake in plastic wrap and then again in aluminum foil to prevent freezer burn. It can stay fresh for up to a month in the freezer. Just remember to let it thaw before serving!
Nutrition Information
One slice of Hagrid’s birthday cake contains about 480 calories. Each slice brings along a mix of carbohydrates from the cake and fats from the butter in the frosting. While indulgent, it’s a treat best enjoyed in moderation, especially if you’re celebrating a special occasion!
Serving Suggestions
– Serve with Ice Cream: A scoop of vanilla bean or chocolate ice cream would take this cake to the next level of indulgence.
– Dust with Powdered Sugar: A light dusting of powdered sugar on the plate gives a great contrast to the rich chocolate!
– Pair with Fresh Berries: Fresh strawberries or raspberries cut through the sweetness beautifully, adding a pop of color.
– Cocktail Harmony: Serve alongside a raspberry lemonade or chocolate martini for a fun twist at gatherings.
– Coffee Companion: A cup of strong coffee complements the chocolate flavors while providing a nice balance.
What Other Substitute Can I Use in Hagrid’s Birthday Cake?
– Gluten-Free Flour: Substitute all-purpose flour with a gluten-free flour blend for a gluten-free version.
– Coconut Oil: Replace vegetable oil with melted coconut oil for a tropical hint.
– Almond Milk: Swap out buttermilk for almond or oat milk for a dairy-free option.
– Dark Cocoa Powder: Use dark cocoa powder instead of regular cocoa powder for a deeper flavor.
– Vanilla Bean Paste: For an aromatic twist, replace the vanilla extract with vanilla bean paste for intense flavor.

Hagrid’s Birthday Cake
Equipment
- mixing bowls
- Stand mixer
- Spatula
- 3 round cake pans (8-inch)
- Parchment paper
- Wire rack
- piping bag
Ingredients
- To craft this delightful creation gather the following ingredients:
Cake:
- – 1¾ cups all-purpose flour
- – 3/4 cup cocoa powder
- – 2 teaspoons baking soda
- – 3/4 teaspoon baking powder
- – 1 teaspoon salt
- – Scant 2 cups granulated sugar
- – 3 large eggs
- – 1 cup buttermilk
- – 1/2 cup vegetable oil
- – 1 teaspoon pure vanilla extract
- – 1 cup warm coffee
- – Optional: 1 tablespoon espresso powder for an enhanced chocolate flavor
Frosting:
- – 2 cups softened butter
- – 6 cups powdered sugar
- – 6 tablespoons heavy cream
- – 2 teaspoons pure vanilla extract
- – Optional: A pinch of sea salt for contrast in flavor
- Feel free to switch things up based on what you have at home or what’s in season!
Instructions
Step 1: Prepare your pans
- Start by preheating your oven to 350°F (175°C). Grease three 8-inch round cake pans thoroughly, then dust with flour or line them with parchment paper. This ensures your cakes lift out seamlessly, ready for frosting!
Step 2: Mix the dry ingredients
- In a medium bowl, sieve together the flour, cocoa powder, baking soda, baking powder, espresso powder (if using), and a pinch of salt. This step avoids any lumps and combines everything nicely. Set it aside while you tackle the wet ingredients.
Step 3: Whip up the batter
- In a large mixing bowl, beat together the sugar and eggs on medium speed. Do this for about 2-3 minutes until the mixture becomes light and fluffy—it’s like whipping up clouds! Once fluffy, add in the buttermilk, vegetable oil, and vanilla extract. Mix until everything is fully blended.
Step 4: Combine wet and dry ingredients
- Now pour the dry ingredients into the wet mixture. Alternate adding in the warm coffee to the batter. Stir gently until combined, but don’t overdo it! Just enough to meld all the ingredients, then scrape down the sides of the bowl and mix again for another minute to ensure a uniform batter.
Step 5: Divide the batter
- First, weigh your mixture if you have a scale to divide evenly, but if not, eyeballing is fine! Pour approximately 16 ounces of batter into each cake pan.
Step 6: Bake those beauties
- Slide your pans into the preheated oven and bake for 18–20 minutes. Keep an eye on them! A toothpick inserted in the center should come out clean when they’re done. Let them cool in the pans for about 20 minutes; this will make them easier to remove.
Step 7: Cool on a rack
- Carefully turn out the cakes onto a wire rack to cool completely. Cooling is crucial; you want your layers to be cool enough to frost without melting the buttercream.
Step 8: Make the frosting
- Using a stand mixer fitted with a paddle attachment, beat the softened butter for about 2-3 minutes until it’s creamy and smooth. Gradually add in the powdered sugar one cup at a time, mixing on low until it’s all combined. Next, stir in the heavy cream, and vanilla extract, then scrape the sides of the bowl. Beat on medium speed for approximately 5 minutes until the frosting is fluffy and light—a treat for your taste buds!
Step 9: Color your frosting
- Scoop out 1/2 cup of frosting into a small bowl and tint this green (using food coloring), while the rest of it remains the classic pink. This combination adds a whimsical touch to your cake.
Step 10: Assemble the cake
- To bring it all together, place one layer of the cooled cake on a serving plate. Spread around 1 cup of the frosting on top. Place the second layer of cake on top, and you can either stop there or add the third layer for that going-the-extra-mile vibe! Frost the entire outside with the pink frosting, smoothing it out but leave it somewhat rugged for that signature Hagrid look.
- To top it all off, pipe your “Happee Birthdae” message across the top with the green frosting—a perfect capstone for your magical cake!
Notes
Nutrition
FAQs
1. Can I use a different frosting?
Absolutely! Feel free to a chocolate ganache recipe or a whipped cream frosting for a lighter option.
2. How can I make this cake more chocolaty?
For a more chocolatey cake, try adding chocolate chips into the batter or between layers.
3. What if my cakes domed while baking?
No worries! Use a serrated knife to trim the domes and provide a flat surface for stacking.
4. How many servings does this cake provide?
This recipe yields about 12 generous servings, depending on how large you slice it!
5. Can I add fruit to the cake?
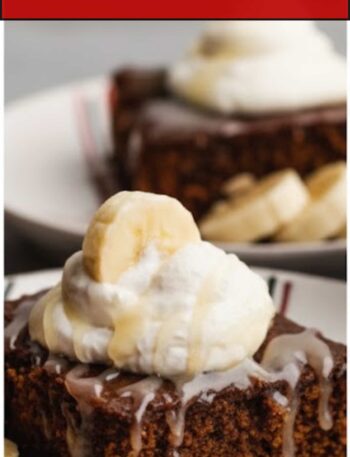
You can add fruit between the layers such as sliced strawberries, bananas, or even raspberries for an added taste burst.
Conclusion
Creating Hagrid’s birthday cake is not just about following a recipe; it’s about bringing a little bit of magic into your kitchen and celebrations. With layers of rich chocolate, a whimsical touch, and the love you pour into it, this cake will surely make any occasion unforgettable. Good food, good company, and a sprinkle of fun—there’s nothing quite like sharing a delicious cake that leaves everyone feeling a bit of that Harry Potter magic. Now, gather your ingredients and let the baking begin!