Sarah Brown
When I’m dreaming about snacks, the peanut butter cornflakes bar always comes to mind. This delightful concoction not only sates hunger but also hits the sweet spot without straying too far from nutritional goodness.

As I swirl the crunchy cornflakes with the creamy peanut butter, I can’t help but think of all the delicious possibilities. Pair it with a hot cup of coffee in the morning, or perhaps a frosty glass of milk in the evening. The combinations are endless. Let me take you on a journey to enjoy this delectable treat.
What Is Peanut Butter Cornflakes Bar?
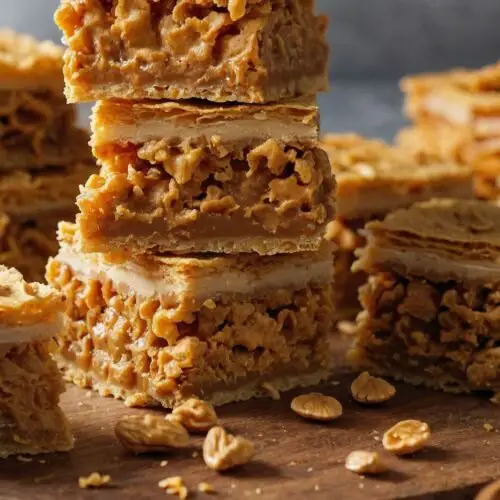
Peanut butter cornflakes bar is a no-bake, easy-to-prepare snack that combines crunchy cornflakes with rich peanut butter, sweet honey, and the smoothness of coconut oil. A treat that’s perfect for kids and adults alike, it appeals to those seeking an energy boost or simply something satisfying to munch on.
Think of it as a fusion of crispy cereal bars and your favorite peanut butter sweets, bound together by the natural sweetness of honey.
Why You’ll Love This Peanut Butter Cornflakes Bar
Let me tell you why you’ll adore this snack. First, it’s incredibly easy to make! You don’t need to be a seasoned chef, nor do you require fancy equipment. Just some mixing bowls and a spoon will do. And let’s not forget.
1. Balanced Flavors: The combination of sweet honey, savory peanut butter, and the crunchiness of cornflakes creates a symphony of flavors. Each bite delivers a delightful crunch that contrasts with the smooth creaminess of peanut butter.
2. Energy Boost: This bar is packed with good fats and carbohydrates. It serves as an excellent pre-workout snack, or great for kids needing a boost during a long day. You’ll feel satisfied and energized for hours.
3. Customization: You can throw in extras like chocolate chips, seeds, or dried fruit. The flexibility means it can cater to everyone’s tastes, whether you prefer chewy textures or something a bit more indulgent.
4. Healthier Ingredients: With wholesome peanut butter, honey, and cornflakes, you get a nutritious snack that won’t leave you feeling guilty. These ingredients provide essential nutrients while still feeling satisfying.
5. Make-Ahead Friendly: These bars can be prepared in advance and stored for up to a week, making them perfect for busy schedules!
You will also like the following Dessert recipes!
The Ingredients You Will Need to Make Peanut Butter Cornflakes Bar
Before you dive in, let’s gather the ingredients. You’ll need:
- 1 cup creamy natural peanut butter: The base of the bar. Choose natural for a healthier option!
- 1/4 cup solid coconut oil: Helps bind the ingredients together while adding a hint of tropical flavor.
- 6 cups crushed cornflakes: The crunchy goodness that gives these bars their name.
- 1 cup pure honey: Adds sweetness and a sticky texture.
- 1/2 tsp ground cinnamon: A spice that brings warmth to the flavor.
- 2 tbsp finely chopped roasted peanuts: For an extra crunch.
- 1/4 tsp sea salt: Enhances flavors. Omit if your peanut butter is salted.
Chocolate Topping Ingredients
- 2 tbsp solid coconut oil: Used again to help melt the chocolate smoothly.
- 1½ cups semi-sweet chocolate chips: For that indulgent chocolate layer.
- 2 tbsp peanut butter: To add flavor to the chocolate coating.
- A pinch of flaky sea salt (optional): Just a tiny bit can elevate the chocolate flavor.

Directions
Ready to make these tasty bars? Let’s break it down with clear steps!
Step 1: Prep Your Workspace
Before you begin, make sure your workspace is ready. Gather all your ingredients and tools like mixing bowls, a spatula, and a baking dish. Line an 8×8-inch pan with parchment paper for easy removal later.
Step 2: Melt the Coconut Oil
In a small saucepan over low heat, combine 1/4 cup coconut oil and 1 cup honey. Stir gently until melted. This combination creates the binding liquid for your bar.
Step 3: Combine ingredients
In a large mixing bowl, add 1 cup peanut butter, the melted coconut oil mixture, and 1/2 tsp ground cinnamon. With a spatula, stir until smooth.
Step 4: Mix in Cornflakes
Add 6 cups crushed cornflakes and 2 tbsp chopped roasted peanuts into the bowl. Mix gently to coat all the cornflakes without crushing them. You want that satisfying crunch!
Step 5: Transfer to the Pan
Transfer the mixture into your prepared baking dish. Press it down firmly using the spatula, ensuring it’s even and compact.
Step 6: Prepare the Chocolate Topping
In a clean saucepan, melt the remaining 2 tbsp coconut oil, 1½ cups chocolate chips, and 2 tbsp peanut butter over low heat, stirring until smooth.
Step 7: Pour the Topping
Once melted, pour the chocolate mixture over the cornflake mixture in the baking dish. Spread evenly, and sprinkle a pinch of flaky sea salt on top (if using).
Step 8: Chill and Set
Place the bars in the refrigerator for at least 2 hours or until set. Patience is key, but I promise you will find it worthwhile.
Step 9: Cut and Serve
Once set, lift the bars out using the parchment paper. Cut them into squares or rectangles. Enjoy your homemade peanut butter cornflakes bars!
Notes
Here are a few tips to elevate your peanut butter cornflakes bar game:
- Use Natural Ingredients: Choose natural peanut butter without sugar and oils to stay healthy.
- Experiment with Flavors: Add mini chocolate chips, dried fruits, or seeds based on your preference.
- Watch the Temperature: Melting coconut oil and honey over low heat prevents burning.
- Patience is Key: Allow the bars to set properly for the best texture.
- Adjust Sweetness: Modify honey based on your sweetness preference.
Storage Tips
Storing your peanut butter cornflakes bars correctly will keep them fresh for longer. Here are some tips:
- Airtight Container: Store the bars in an airtight container to maintain their crunch.
- Refrigerate: Keep them in the fridge to prevent them from becoming too soft, especially in warm weather.
- Freeze If Necessary: You can freeze the bars. Cut them into portions and separate with parchment paper to prevent sticking.
- Consume Within a Week: For the best fresh taste, try to consume them within seven days.
Nutrition Information
These bars not only taste fantastic, but they also bring some nutritional benefits. A single serving can provide:
- Calories: Approximately 180 (varies based on additions)
- Protein: 5g from peanut butter
- Fat: 9g (mostly healthy fats from peanut butter and coconut oil)
- Carbohydrates: 22g from cornflakes and honey
- Fiber: 1g from cornflakes
- Sugar: 10g from honey (natural sweetener)
Remember, these values can change based on the specific ingredients used.

Serving Suggestions
Let’s dive into how you might enjoy these bars beyond just snacking:
- Top with Fresh Fruit: Sliced bananas or strawberries add a fresh twist. It creates a delightful contrast with the sweetness.
- Pair with Yogurt: Serve with a dollop of Greek yogurt for a well-rounded breakfast that will keep you full.
- Crushed as a Topping: Crumble the bars over your morning oatmeal or smoothie bowl for added crunch.
- With Ice Cream: Who says dessert can’t be creative? Top vanilla ice cream with broken pieces of these bars for an indulgent treat.
- On a Charcuterie Board: Slice into smaller pieces and add them to a dessert charcuterie board with fruits, nuts, and cheeses.
What Other Substitutes Can I Use in Peanut Butter Cornflakes Bar?
Sometimes you might want to switch things up. Here are five great alternatives:
- Almond Butter: Substituting almond butter for peanut butter provides a slightly different flavor and is perfect for those with peanut allergies.
- Maple Syrup Instead of Honey: For a vegan alternative, maple syrup works well while adding a unique taste.
- Rice Cereal: Instead of cornflakes, use crisped rice cereal for a gluten-free option.
- Nut Mixture: Mix in a variety of chopped nuts like walnuts, cashews, or pecans for added textures.
- Chocolate Protein Powder: If you’re looking for added protein, incorporate chocolate protein powder directly into the mixture while it’s being stirred.
Peanut Butter Cornflakes Bar
Equipment
- Bowl
- Spatula
Ingredients
- 1 cup creamy natural peanut butter: The base of the bar. Choose natural for a healthier option!
- 1/4 cup solid coconut oil: Helps bind the ingredients together while adding a hint of tropical flavor.
- 6 cups crushed cornflakes: The crunchy goodness that gives these bars their name.
- 1 cup pure honey: Adds sweetness and a sticky texture.
- 1/2 tsp ground cinnamon: A spice that brings warmth to the flavor.
- 2 tbsp finely chopped roasted peanuts: For an extra crunch.
- 1/4 tsp sea salt: Enhances flavors. Omit if your peanut butter is salted.
Chocolate Topping Ingredients
- 2 tbsp solid coconut oil: Used again to help melt the chocolate smoothly.
- 1½ cups semi-sweet chocolate chips: For that indulgent chocolate layer.
- 2 tbsp peanut butter: To add flavor to the chocolate coating.
- A pinch of flaky sea salt optional: Just a tiny bit can elevate the chocolate flavor.
Instructions
Step 1: Prep Your Workspace
- Before you begin, make sure your workspace is ready. Gather all your ingredients and tools like mixing bowls, a spatula, and a baking dish. Line an 8×8-inch pan with parchment paper for easy removal later.
Step 2: Melt the Coconut Oil
- In a small saucepan over low heat, combine 1/4 cup coconut oil and 1 cup honey. Stir gently until melted. This combination creates the binding liquid for your bar.
Step 3: Combine ingredients
- In a large mixing bowl, add 1 cup peanut butter, the melted coconut oil mixture, and 1/2 tsp ground cinnamon. With a spatula, stir until smooth.
Step 4: Mix in Cornflakes
- Add 6 cups crushed cornflakes and 2 tbsp chopped roasted peanuts into the bowl. Mix gently to coat all the cornflakes without crushing them. You want that satisfying crunch!
Step 5: Transfer to the Pan
- Transfer the mixture into your prepared baking dish. Press it down firmly using the spatula, ensuring it’s even and compact.
Step 6: Prepare the Chocolate Topping
- In a clean saucepan, melt the remaining 2 tbsp coconut oil, 1½ cups chocolate chips, and 2 tbsp peanut butter over low heat, stirring until smooth.
Step 7: Pour the Topping
- Once melted, pour the chocolate mixture over the cornflake mixture in the baking dish. Spread evenly, and sprinkle a pinch of flaky sea salt on top (if using).
Step 8: Chill and Set
- Place the bars in the refrigerator for at least 2 hours or until set. Patience is key, but I promise you will find it worthwhile.
Step 9: Cut and Serve
- Once set, lift the bars out using the parchment paper. Cut them into squares or rectangles. Enjoy your homemade peanut butter cornflakes bars!
Notes
- Use Natural Ingredients: Choose natural peanut butter without sugar and oils to stay healthy.
- Experiment with Flavors: Add mini chocolate chips, dried fruits, or seeds based on your preference.
- Watch the Temperature: Melting coconut oil and honey over low heat prevents burning.
- Patience is Key: Allow the bars to set properly for the best texture.
- Adjust Sweetness: Modify honey based on your sweetness preference.
Nutrition
Frequently Asked Questions
1. Can I make these bars vegan?
Absolutely! Simply substitute honey with maple syrup and ensure all other ingredients are vegan-friendly, such as using dark chocolate chips.
2. What type of peanut butter should I use?
Choose creamy, natural peanut butter without added sugar or oils. This keeps the bars nutritious and delicious.
3. How do I make these bars gluten-free?
Stick with certified gluten-free cornflakes or substitute with gluten-free rice cereal.
4. What should I do if my bars aren’t setting properly?
If the bars aren’t setting, try refrigerating them longer. If still soft, they might need more coconut oil or honey to bind.
5. Can I add protein powder to this recipe?
Yes! You can mix protein powder into the peanut butter mixture for an added protein boost without changing the texture significantly.
6. How do I cut the bars neatly?
Use a sharp knife. Warming the knife in hot water beforehand can help make neat cuts.
Conclusion
The peanut butter cornflakes bar is not just a snack; it’s a delightful experience. With its crunchy texture and rich flavor, it’s a versatile treat you can whip up with ease. Whether you indulge with a morning coffee or serve it at a gathering, it’s bound to impress.
Beyond just being tasty, these bars are healthy and customizable, allowing you to explore and get creative in your kitchen. You can channel your inner chef without too much fuss. So roll up your sleeves, gather your ingredients, and make a batch today. You won’t regret it!