Imagine biting into a perfectly sweet and crunchy treasure bar, only to have its flavors complemented by a hot cup of coffee or tea. These bars are also perfect with a glass of cold milk or an indulgent scoop of vanilla ice cream. Feeling adventurous? Pair them with a rich, buttery Chardonnay or a sweet, nutty dessert wine to elevate the entire experience.
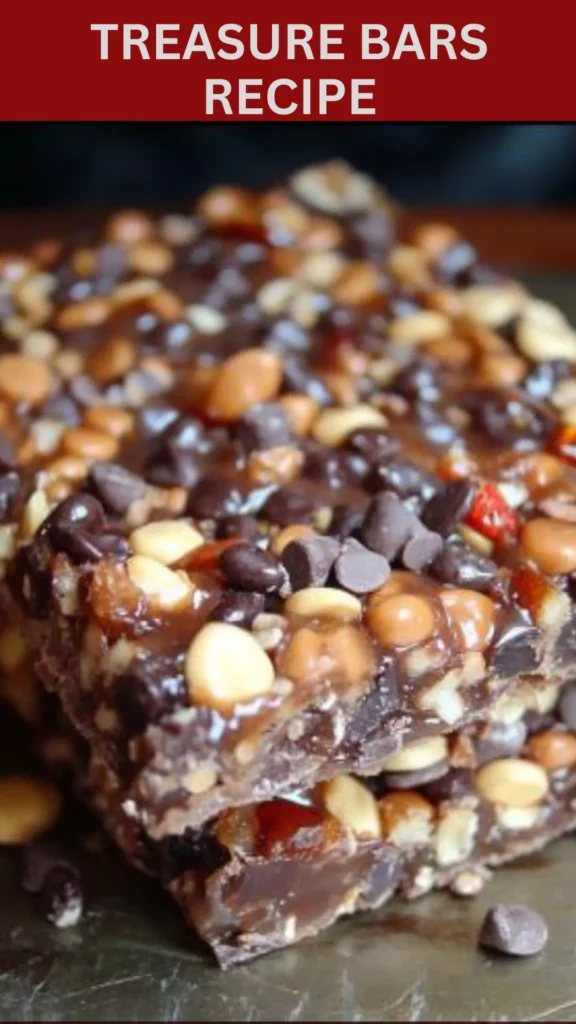
Today, I’m incredibly excited to share with you a gem of a recipe: treasure bars. As a registered dietitian and avid home cook, I’ve always believed that creating delicious yet straightforward recipes can bring joy and satisfaction. When I stumbled upon this treasure bars recipe, I was instantly hooked, and I knew I had to share my take on it.
What is Treasure Bars?
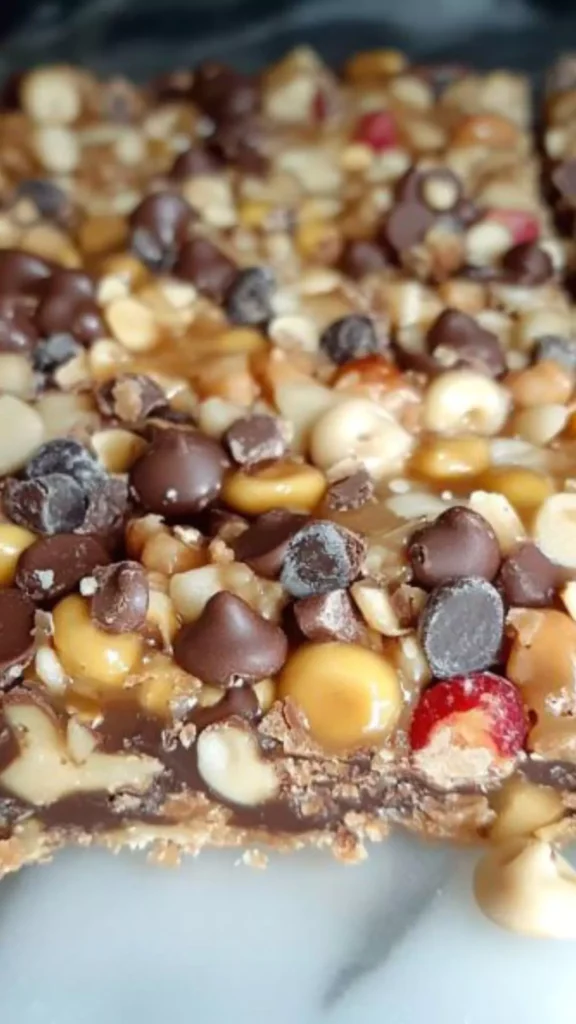
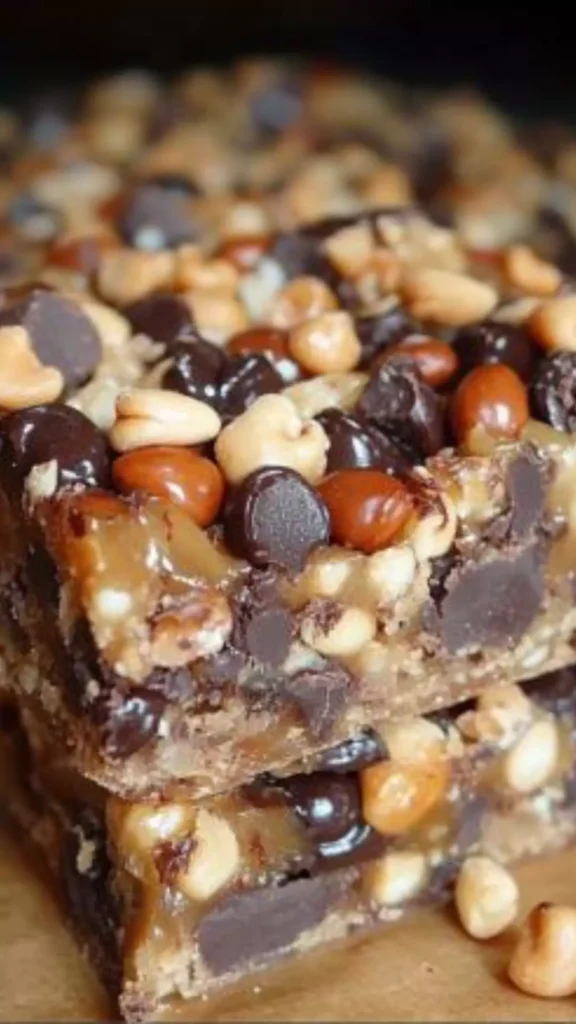
Treasure bars are an irresistible dessert made from a buttery graham cracker crust layered with an indulgent mix of condensed milk, caramel bits, chocolate chips, toasted coconut flakes, and chopped walnuts. They are often described as magically delicious due to their rich combination of flavors and textures.
Why This Recipe Works
You might wonder why this treasure bars recipe stood out among countless others. Here’s the scoop: the crunchiness of the graham cracker crust provides a solid base, while the sweetened condensed milk ensures a gooey, rich texture.
Caramel bits add a chewy element, contrasting beautifully with the crisp toasted coconut flakes. The semi-sweet chocolate chips melt during baking, creating a luscious chocolate layer. Chopped walnuts introduce an earthy flavor, making every bite delightful and balanced.
What You’ll Need to Make This Dish
To whip up these treasure bars, you’ll need some basic pantry ingredients and a few special add-ins:
For the Bottom Crust:
- 3 tablespoons granulated sugar
- 7 oz unsalted butter, melted
- 4 cups graham cracker crumbs
For the Treasure Bar Topping:
- 1 teaspoon vanilla extract
- 1/2 teaspoon sea salt
- 2 cans sweetened condensed milk (14 oz each)
- 1 cup caramel bits
- 12 oz semi-sweet chocolate chips
- 3 cups toasted coconut flakes
- 2 cups chopped walnuts
How to Make Treasure Bars?
Making treasure bars is simpler than most people think. Once you gather your ingredients, the process becomes a smooth sail. Here are the step-by-step instructions to guide you through.
Step-by-Step Instructions
Step 1: Prepare the Bottom Crust
First, preheat your oven to 350°F (175°C) and line a 9×13-inch baking dish with parchment paper. Combine the granulated sugar, melted butter, and graham cracker crumbs in a mixing bowl. Stir until well-combined.
Step 2: Press the Crust Mix into the Baking Dish
Press the graham cracker mixture firmly into the lined baking dish. Use a flat-bottomed glass or your hands to ensure it’s evenly spread. Bake in the preheated oven for about 10 minutes until lightly browned.
Step 3: Add the Sweetened Condensed Milk
Remove the crust from the oven and pour sweetened condensed milk evenly over the baked crust. Spread it with a spatula to ensure even coverage.
Step 4: Sprinkle the Toppings
Start by sprinkling vanilla extract and sea salt over the condensed milk. Then, add caramel bits, semi-sweet chocolate chips, toasted coconut flakes, and chopped walnuts in layers. Ensure each ingredient is evenly distributed for a balanced flavor.
Step 5: Bake
Place the baking dish back in the oven and bake for another 25-30 minutes, or until the edges are golden brown and the center is set. Remove from the oven and let it cool completely before cutting into bars.
Tips
- Toast the Coconut Flakes: Toasting coconut flakes in a skillet over medium heat enhances their flavor and adds extra crunch.
- Chill Before Cutting: Let the bars cool completely, or refrigerate them for at least an hour. This makes cutting easier and prevents crumbling.
- Customize Nuts: If you’re not a fan of walnuts, try substituting with pecans or almonds.
- Use Quality Chocolate: High-quality semi-sweet chocolate chips make a noticeable difference.
- Prevent Sticking: Line your baking dish with parchment paper to facilitate easy lifting and cutting.
How to Store Leftovers?
Keep leftovers in an airtight container at room temperature for up to five days. For longer storage, freeze the bars in a container with layers separated by wax paper. They can be frozen for up to three months.
Nutrition Information
How Would I Recommend Serving Treasure Bars?
As a dessert platter: Arrange treasure bars on a pretty dessert plate alongside fresh berries and a drizzle of caramel sauce.
With ice cream: Serve bars warm with a scoop of vanilla or caramel ice cream for a delightful contrast.
Afternoon tea treat: Pair with your favorite tea or coffee for a perfect afternoon pick-me-up.
Gift packs: Wrap them in parchment paper and put them in decorative boxes as thoughtful homemade gifts.
What Alternatives Can You Use for the Ingredients if Not Available?
Without graham cracker crumbs? Use digestive biscuits or crushed vanilla wafers as a substitute.
No walnuts? Swap them out for pecans, almonds, or even hazelnuts.
If you run out of sweetened condensed milk, a DIY version with milk and sugar cooked together can do the trick.
Don’t like semi-sweet chocolate chips? Opt for milk chocolate or even white chocolate chips for a different flavor twist.
Treasure bars recipe
Equipment
- 9×13-inch baking dish
- Parchment paper
- Mixing bowl
Ingredients
Bottom Crust:
- 3 tablespoons Granulated Sugar
- 7 oz Unsalted Butter
- 4 cups Graham Cracker Crumbs
Treasure Bar Topping:
- 1 teaspoon Vanilla Extract
- 1/2 teaspoon Sea Salt
- 2 cans Sweetened Condensed Milk
- 1 cup Caramel Bits
- 12 oz Semi-Sweet Chocolate Chips
- 3 cups Toasted Coconut Flakes
- 2 cups Chopped Walnuts
Instructions
Step 1: Prepare the Bottom Crust
- First, preheat your oven to 350°F (175°C) and line a 9×13-inch baking dish with parchment paper. Combine the granulated sugar, melted butter, and graham cracker crumbs in a mixing bowl. Stir until well-combined.
Step 2: Press the Crust Mix into the Baking Dish
- Press the graham cracker mixture firmly into the lined baking dish. Use a flat-bottomed glass or your hands to ensure it’s evenly spread. Bake in the preheated oven for about 10 minutes until lightly browned.
Step 3: Add the Sweetened Condensed Milk
- Remove the crust from the oven and pour sweetened condensed milk evenly over the baked crust. Spread it with a spatula to ensure even coverage.
Step 4: Sprinkle the Toppings
- Start by sprinkling vanilla extract and sea salt over the condensed milk. Then, add caramel bits, semi-sweet chocolate chips, toasted coconut flakes, and chopped walnuts in layers. Ensure each ingredient is evenly distributed for a balanced flavor.
Step 5: Bake
- Place the baking dish back in the oven and bake for another 25-30 minutes, or until the edges are golden brown and the center is set. Remove from the oven and let it cool completely before cutting into bars.
Notes
- Toast the Coconut Flakes: Toasting coconut flakes in a skillet over medium heat enhances their flavor and adds extra crunch.
- Chill Before Cutting: Let the bars cool completely, or refrigerate them for at least an hour. This makes cutting easier and prevents crumbling.
- Customize Nuts: If you’re not a fan of walnuts, try substituting with pecans or almonds.
- Use Quality Chocolate: High-quality semi-sweet chocolate chips make a noticeable difference.
- Prevent Sticking: Line your baking dish with parchment paper to facilitate easy lifting and cutting.
Nutrition
Frequently Asked Questions
Can I make this recipe gluten-free?
Absolutely! Just use gluten-free graham crackers to make the crust gluten-free. Ensure all other ingredients are certified gluten-free.
Can I prepare treasure bars in advance?
Yes, these bars taste even better the next day. You can make them a day ahead and store them in an airtight container.
Do they need to be refrigerated?
They don’t need refrigeration, but doing so can extend their shelf life and maintain their texture.
What if I don’t like coconut?
You can leave out the toasted coconut flakes and increase the amount of nuts and chocolate chips to maintain the texture.
Can I use unsweetened condensed milk?
Sweetened condensed milk is crucial for this recipe due to its caramelizing properties. Unsweetened condensed milk won’t provide the same sweetness or texture.
Are treasure bars kid-friendly?
Absolutely, kids love the mix of chocolate, caramel, and nuts. Just be mindful of any nut allergies.
Conclusion
If you’re on a quest to find the perfect treat that balances sweet, chewy, crunchy, and rich all in one bite, treasure bars won’t disappoint. Make them for parties, family gatherings, or just because you crave something scrumptious. With simple pantry ingredients and an easy-to-follow process, you’ll have this delectable treat ready in no time. Enjoy whipping up, sharing, and savoring each bite of this delightful recipe!

